

 Buy 3 chess training programs for the price of 2
Order any two training programs in our online chess shop and get a third training program absolutely free. If your order is more than $120 / €100 Euro, you will get additional present.
New CT-ART 5.0 combines three excellent courses guiding you from beginner to advanced level.

Improve your chess playing skills this Spring with amazing Special Deals at Chessok.com!
OFFER 1 – AQUARIUM 2024: 30% OFF the newly released ChessOK Aquarium 2024!
- ChessOK Aquarium 2024 (download) –
$49.95$34.97
OFFER 2 – CHESS ASSISTANT 24: Buy Chess Assistant 24 with 30% off!
- Chess Assistant 24 (download) –
$94.95$66.47 - Upgrade Chess Assistant 23 to 24 (download) –
$74.95$52.47 - Upgrade Chess Assistant 22 or earlier to 24 (download) –
$84.95$59.47
OFFER 3 – MULTIPLATFORM TRAINING: You can buy our training courses (such as CT-ART 6.0 and others) in three different versions:
1. Multiplatform for 5 systems: Windows standalone, Web (any browser), iOS, MacOS (v.10.15+) and Android OS** – 30% off!
2. Windows only version: the classic standalone course in Peshk@ interface – 50% off!
3. Upgrade your Windows only version to work on 4 more platforms (see above) – 50% off!
OFFER 4 – BOOKS: Buy any two books and get a thirds one as a gift!
OFFER 5 – TRAINING SOFTWARE: Buy any two training programs in our online chess shop and get a third training program for free.
Note: Specify the bonus products(s) you want to receive in the comments field when filling the order form.
The newest installment of ChessOK Aquarium has been released!
ChessOK Aquarium 2024 is an advanced chess analysis software featuring the world’s best analysis tools: Interactive Deep Analysis (IDeA), CAP analysis, chess trees etc.
ChessOK Aquarium 2024 comes with grandmaster level playing program, and can auto-download and install popular chess engines, including the strongest engine to date Stockfish 16.
You also receive the latest version of databases with about 8.9 million games in total.
BONUS: Buy ChessOK Aquarium 2024 and get a 3-month subscription at Chess King Learn, giving you full access to all 100 Chess King training courses!
- ChessOK Aquarium 2024 – $49.95
Chess Assistant 24 released!
Chess Assistant 24 is a unique tool for managing chess games and databases, playing chess through the Internet, analyzing games, or playing chess against the computer.
Automatically downloads and connects Stockfish 15 upon installation and also has Rybka 4 engine, databases with 8.9 million games updated weekly, Chess Opening Encyclopedia, 3 months of Chess King Learn subscription and many other features.
BONUS: Buy Chess Assistant 24 and get 3 BONUS months of subscription at Chess King Learn, giving you full access to 90+ training courses in Web, iOS and Android OS!
- Chess Assistant 24 (download) –
$94.95$75.96 - Upgrade Chess Assistant 23 to 24 (download) –
$74.95$59.96 - Upgrade Chess Assistant 22 or earlier to 24 (download) –
$84.95$67.96
New Chess King Learn Packages are now available in our shop!
Buy digital learning packages and become a Chess Master with carefully picked and critically acclaimed acclaimed courses for any level of play, from complete beginnet to the advanced training course by Mark Dvoretsky.
All packages include access to courses on the Chess King Learn website that you can explore in in your web browser and in mobile apps for Android and iOS! Your progress and statistics sync between Web and Mobile, so you can keep learning seamlessly anywhere you go.
- CT-ART 10 Chess Tactics – recommended by coaches worldwide, this package has everything you need to know about chess tactics. Levels 1 – 9 [Rating 200-2400]
- Chess King Beginners 6 – a combo of the best 6 courses that will help you go from nothing to proficient at chess. For players Unrated to 1400.
- Chess King Strategy/Endgames 5 – 4 strategy courses and 1 complete endgame course, levels 4 – 9 [Rating 1000-2400]
- Chess King Complete 25 – a combo of 25 the most important chess courses in all areas, levels 1 – 9 [Rating 200-2400]
- Chess King Complete 100 – all 100 Chess King Learn’s chess courses, levels 1 – 9 [Rating 200-2400], More than 200,000 exercises!
- Chess King Learn ULTRA pack 100 Best of Best – same as Chess King Complete 100, PLUS 20 best selling chess courses in video format from chessking.tv. Levels 1 – 9 [Rating 200-2400]
- Dvoretsky 5 advanced courses combo – 5 courses by one of the most successful trainers ever. 1000 exercises for Advanced players, levels 8 – 9 [Rating 2000-2400]

The new Chess King 23 is considerably improved from the original Chess King or from any of the previous versions of Chess King.
Updated GigaKing database, a full opening tree, and many playing modes. Analysis with Grandmaster engine Rybka and automatically installes Stockfish with a rating above 3400 ELO.
The perfect tool for any chess player to improve at chess, by playing, analyzing one’s games, solving thousands of chess exercises. Provides a complete chess program at an unbelievably low price.
BONUS: To help you improve faster, we include a 3-month Free subscription to 100 Complete Chess King courses from Chess King Learn. They can be used on any computer browser (Mac or PC), and on any portable device (iOS or Android). The courses can also be downloaded to your device and used offline.
New books are available in our shop!.
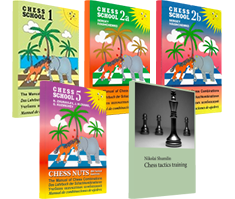
Chess Tactics Training by Nikolai Shumilin:
Deeply thought out structure, thoroughly picked material, gradually increasing complexity and difficulty make this book useful for beginners, experianced players and chess trainers alike.
Moscow 2021, Hard cover, 192 pages.
The Manual of Chess Combinations, vol. V, Chess nuts:
This book is written by experienced chess masters and trainers to help players develop combination vision by systematic training in examining and solving typical combinations. The book also allows to determine your level of combination skills.
Moscow 2021. Hard cover, 118 pages.
Manual of Chess Combinations, Vol. I:
Learn to solve more complicated problems. Our new book includes combinations occurred in the games by well-known players, including outstanding masters of the past and the present. The material is arranged in sections of increasing complexity.
Moscow 2017. 256 pages.
The Manual of Chess Combinations 2a:
The first part of volume II. Learn to solve even more complicated problems. Completing each section can be roughly estimated as adding 100 points to your rating. So the book should lead you up the rungs of chess mastery from a rating of 1600-1700 to a solid level of 2200 Elo.
Moscow 2021. 136 pages.
The Manual of Chess Combinations 2b:
The second part of volume II. Learn to solve even more complicated problems. Completing each section can be roughly estimated as adding 100 points to your rating. So the book should lead you up the rungs of chess mastery from a rating of 1600-1700 to a solid level of 2200 Elo.
Moscow 2021. 144 pages.
CT-ART is now available on Android – check it out on Google Play or Download Apk!
This excellent tactics course has been voted more than once by the chess experts as the best training program on chess tactics. CT-ART is an indispensable training tool for intermediate players sporting an advanced hint system – each position is accompanied with a similar one on a 5×5 board, demonstrating the main point of the example!
Does our personality determine the Type of games we play? Read the article to find out!
Study chess online on Chess King Learn! Time-proven training courses, thousands of examples and exercises.
Start playing right now in your web browser on Chess King Playing Zone! Teams, tournaments, training, analysis and much more!
Find your casino ohne Oasis today
Find the most trusted online casino sites in NZ at Newzealandcasinos.nz, biggest casino authority in NZ.

Visit TopCasinoSearch.com to find all the best online casinos. Including full reviews, promotions, and more!
Om du vill hitta information om casino utan svensk licens och spelpaus kan du besöka spelacasinonu.com
[HIDDEN BONUS] If you like Chess we recommend that you visit Casino-on-line.com NOW to DISCOVER the new Slots with 100 FREE Spins! (No deposit Bonus Codes are EXPIRING...)
Visit casinoutanspelpaus.io for best casino guide in sweden.
Visit spelbolagutansvensklicens.co for best betting sites in sweden
Löydä kattava listaus nettikasinoista joissa sinun ei tarvitse rekisteröityä osoitteessa https://www.rahapelit-netissa.com/kasino-ilman-rekisteroitymista/, joka on ilmainen kasinoopas Suomalaisille pelaajille.
Honest online casino reviews, visit https://voitolla.com/netticasino/
Recommended: at www.casino-online.com you can grab the SECRET No Deposit Bonus Codes Usa >> $ 75 free + a Mystery bonus just for you! (ONE-TIME Offer)
You can play chess online for free unlike casino games without having to deposit any money. There’s plenty of chess websites that host tournaments and keep track of your online rankings. With no real money involved, these sites offer training material, practice as well as bragging rights. For information on other games such as craps, visit https://www.casinous.com/
Check out this Finnish casino guide with many free spins (ilmaiskierroksia).
In Sweden the demand for casino utan svensk licens is constantly increasing. Find all the best Swedish online casinos at CUSL today.
最高のオンラインカジノボーナス決定版!日本のオンラインカジノ.comでは高額ボーナスが選べます。